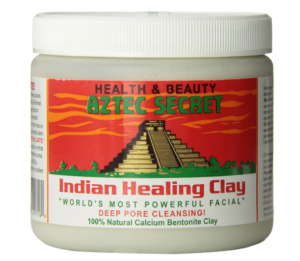
Have you guys heard of the Aztec Secret Indian Healing Clay? Well, if you have not don’t feel weird about it, because up until the beginning of June 2014, I had no idea what it was either!
How I found out about it: One of my favorite YouTube personalities GeekChic01, “Irene Sarah,” had vlogged about her current skincare routine, and in the vlog she talk about a mask that “pulsates.” I was immediately intrigued and took to the internet to do research on it, and also looked at many of the over 1400+ Amazon five star reviews.
What did I learn from my research:
- The Aztec Secret Indian Healing Clay is made from 100% Bentonite Clay.
- Bentonite Clay when mixed with liquid develops a mild electrical charge that aids the clay in attracting impurities in the skin tissues and keeping them attach to the clay, and not get reabsorbed by the skin.
- Depending on your skin type bentonite clay may dry your skin out, so remember to apply a moisturizer
- or you could mix the bentonite clay with milk, instead of water or organic apple cider vinegar.
- Many people claim the best results with Organic Apple Cider Vinegar (I ONLY use the mask with Organic Apple Cider Vinegar).
- Mix the product in glass or plastic, do NOT USE METAL (it apparently de-charges the clay)
- Amazon Review link: click HERE
How to apply the clay mask:
- Start with mixing equal portions of the clay with the mixing substance, if you want a thicker mask, then simply add more of the powder. (put it on your face, neck, back, upper arms – go crazy girl)
- Place the mask on your face, focusing on covering problem areas with a little more of the clay mixture (1/4 of an inch thick).
- Leave it on your face for at least 25 mins — 40 mins PERFECT –1 hour (amazing – and now take it off!)
- While it’s on your face, do not talk or move your face to much. The clay will begin to harden in about 3-5 minutes.
- Once you’re ready to remove it, do not head to the sink instead grab a grocery bag and try and peel a little bit of the mask that comes off easily and effortlessly– do not TUG on your face.
- To remove the clay that did not come off effortless: grab a wash cloth, place it under warm to mildly hot water (DO NOT USE A TEMPERATURE THAT WILL BURN YOUR FACE OR SOMETHING THAT IS HOT, just something that is a little bit more than warm).
- Wet the cloth
- Place the cloth over your face
- Leave it on your face for 30 seconds, now gently swipe your face.
- Do these steps 3 or 4 times, and you’ll be good to go!
- Splash some cold water on your face after fully removing the clay mask
- Now moisturize your face
Side Notes:
- This mask is a clay mask, so it is thick & will clog your sink if you do not dispose of it accordingly. That is why I recommend placing as much of the mud mask in the grocery bag, so you can simply throw it away.
- If you mixed the clay in a bowl, then just wait till the mud dries in the bowl and then scrap it out in the trash, instead of cleaning it while it’s wet!
- My skin did NOT pulsate (I was a tad excited about this part — unfortunately it did not happen to me, although it did happen to my neighbor)!
My experience: I have had an incredibly positive experience with the clay. I’ve gotten one of my roommates to try it, and I feel like she loves it as much as I do! It is incredibly affordable and allows you to relax for a bit. I, personally, loved doing the mask while I was studying for the bar. I would quickly put the mask on, and then begin studying — it almost made studying for the bar a tad tolerable! It has helped reduce the size on my pores and it did loosen my white/blackheads (I actually don’t have that many blackheads anymore -yay).
I did the mask yesterday and I noticed that a few of my whiteheads had surfaced – I quickly decided to skip the cold water portion of my steps and saturated my nose with mildly hot water, and then applied a pore strip. I waited ten minutes and then GENTLY removed the pore strip! The only things on my nose pore strip were a few whiteheads – no blackheads!
Should you purchase it: YES. As stated, it’s so AFFORDABLE ($7-$12). If organic apple cider vinegar is to harsh for your sensitive skin, just use water or a mixture of the apple cider vinegar and water. Also, if you initially break out, don’t worry – this might be happening because your skin is purging itself of the impurities.
If you’re worried: Obviously consult a doctor immediately. I am not a doctor, nor do I claim to be. I am beauty junkie and recent law school graduate – so my advice is limited to my personal results, reviews I have read, and results on friends that have also tried the product with me.
Bye!


